Showing posts with label crafts. Show all posts

Tuesday, April 17, 2012

Handmade Dessert Pedestals


 I knew I wanted to have a few dessert pedestals of varying heights for my friend's baby shower but I didn't want to spend a fortune buying them all. I remembered that I had a lot of crystal candlesticks from my wedding so I bought inexpensive plain white plates from World Market and heated up my glue gun! I could have used an epoxy to glue them permanently but I wanted to be able to use vintage floral plates with the candlesticks for Amelia's 4th birthday party in July.

I applied a bead of glue around the top part of the candlestick and then turned it upside down and pressed it in the middle of the plate. Luckily these square plates from World Market had a small square in the middle which was very helpful!


I then applied glue where the candlestick holder met the plate, sealing any gaps. I built the glue up and over the lip of the candlestick a little to insure it was securely attached.


Let the glue dry completely before turning the pedestal over.

There are so many options and designs you can make with a candlestick and plates! I'm so excited to start searching now for vintage floral plates to make pedestals for Amelia's Mad Hatter Tea Party!!


Tuesday, March 27, 2012

Crochet Doily Baskets


 Making crochet baskets are so easy. My nana used to make them and she would cut a small hole out of the bottom and place it on a lamp like a lamp shade. It was very pretty and romantic. This method can be used to stiffen crochet ornaments and snowflakes. 

I found the crochet doilies and Stiffy fabric stiffener at Micheal's Craft Store. I have some old doilies I want to make into baskets to keep out all year long. These colors are great for Easter tables and decoration. Amelia has already claimed them for herself. She uses them in her play kitchen.
 
Saturate the doily with the fabric stiffener. Squeeze out the excess liquid.

Spread the wet doily over a bowl that has been covered in plastic wrap. I used different sized bowls. Make sure to line up the middle of the doily with the bottom of the bowl. Let it dry over night.
I like using a small bowl so I can spread out the scollops flat so that the basket has a fluted rim.

Friday, December 2, 2011

Dried Orange and Apple Ornaments


I cut apples and oranges into 1/4 to 1/3 inch slices then soaked the apple slices in lemon juice for about 15-30 minutes flipping occasionally. I dehydrated them overnight until they were dry and leathery. 


I found wooden beads at Micheal's and painted them with acrylic paint. I used about a half inch wide ribbon and a yarn needle to string up my dried orange and apple slices as well as bay leaves. I just layered them with a bead at the top and bottom and then tied off the bottom tail. I tied the dried fruit ornaments onto the tree with the extra ribbon at the top.


I love that the spice and dried fruit ornaments give my dining room tree a primitive homemade look.

Thursday, December 1, 2011

Cinnamon and Clove Ornaments


Cinnamon and Clove Ornaments

1 cup ground cinnamon
2 tablespoons ground clove
3/4 cup applesauce

Mix well. If too dry add 1 tablespoon of applesauce at a time. It too wet add 1 tablespoon cinnamon at a time. Pour 1/4 of the mixture onto wax paper, parchment or a dehydrator sheet like I did. Press dough together. I used plastic wrap to cover the dough so my rolling pin would not stick. Roll the dough 1/4 to 1/3 inch thick. Cut out shapes with cookie cutters then make a small hole at the top of the ornament with a straw or skewer. Place on a baking sheet to bake at 200 degrees for 2 1/2 hours or place them on a dehydrator sheet to dehydrate them for a few hours. They can also be left out for a day or two on the counter to dry.


 Be careful while threading ribbon into the ornaments. I may have rolled mine out too thin making them more fragile than I would have liked.


I grew up with a tree in every room. Each had their own theme. The living room tree held all of our family ornaments, handmade ornaments and ornaments collected on our travels. The kitchen tree was one of my favorites. It was decorated with miniature utensils and pans, gingerbread men, candies, foods and a candy garland. The dining room tree was also a favorite because it held vintage glass ornaments that belonged to my mamaw and papaw. My tree was decorated with a Victorian theme. Lots of pink, lace, pearls, and faux candles that clipped to the ends of the branches. My brother's tree had a woodland/hunting theme. 

Since getting married 6 years ago we always had one tree in the living room until I was able to talk the Mister into getting another tree to put in our dining room this year. It's a a decent size 4ft tree for our cozy little cottage. It sits on the fireplace hearth. I decided from the beginning that I wanted to use a primitive homemade theme for decorating it.

The ornaments smell Ah-Mazing! Every time I walk by the tree, the Christmasy scent of cinnamon and clove fills my nose and makes my heart happy.


Thursday, October 13, 2011

Homemade Play Dough

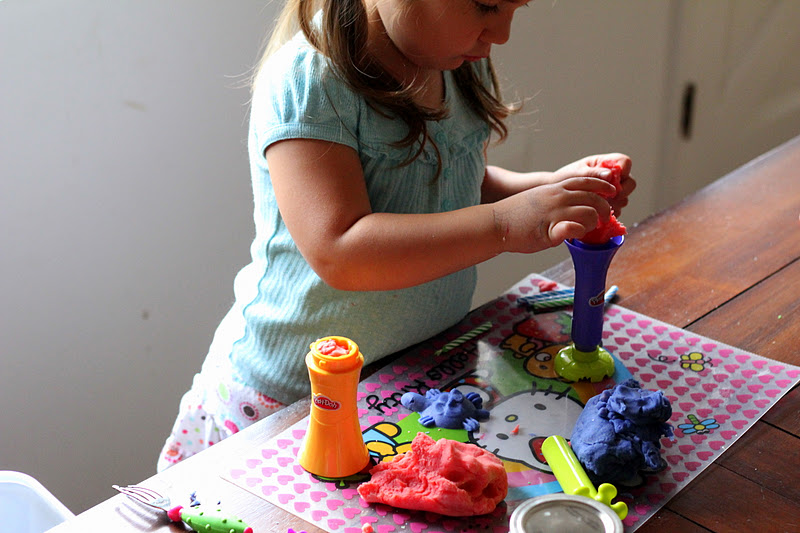
 Amelia and I cooked up a batch of homemade play dough on a rather dreary day.  Amelia left the last batch we made uncovered so we were in need of fresh play dough.  It is so simple and if covered properly it will last for years! I used Martha Stewart's cooked play dough recipe.
 This recipe works great.  All natural ingredients and you can color it any color your heart desires. When you are cooking the dough it looks like it's lumping up and becoming ruined. Don't fret. It will smooth out after you finish cooking it to mashed potato consistency. I divided it into 4 parts and Amelia helped me color them.


 Can you tell she loves it?
 The texture is perfect! Molds and holds up well.


One batch divided up fits well into 4 pint jars.

Tuesday, April 5, 2011

hanging bird seed "cakes"


My daughter loves birds and when she spots one she goes nuts.  So excited.  I thought making bird feeders would be a nice craft to do with her.  I found a recipe for bird seed "cakes" from The Magic Onion.  It's so simple.

Bird Seed "Cakes"

1 oz knox gelatine (4 packets)
1 cup boiling water
3-4 cups bird seed (I used finch bird seed)

Mix the 4 oz gelatin with the 1 cup boiling water and stir till dissolved.  Add in the seeds till a stiff mixture forms. Spoon seed mixture into molds of your choice.  Cut ribbon, yarn or jute string 12-24 inches long. You will want it long enough to bury 2-3 inches of one end into the seed mixture while leaving the other end long enough to tie on a tree branch or hang from a nail.  Let sit for a few hours.  Putting it in the fridge will speed the process up a little. Make sure the "cakes" are completely firm before removing them from the mold. 
To un-mold, dip the bottoms of the molds into hot water for a minute or so and if needed, use a knife around the edges to loosen a little.  Gently remove the "cakes" and hang.


We also filled some pines cones that we brought back from Va. The seed mixture stuck really well into the pine cones.  We tied jute string to the top of the pine cones.


Here is the finished product.  I hope the birds like them.  I love to hear a bird sing.