Tuesday, December 14, 2010

Crochet Baby Gifts


I made these beauties for my sweet baby niece Olivia.  I knew right away that this little girl needed frilly handcrafted things.  I was so right.  She is quite the princess being the only baby girl in a house with two older brothers.

I came across a pattern for a crochet baby cloche on one of my favorite blogs, Aesthetic Nest. I joke that I want to be like her when I grow up.  She is so fun!  She puts together amazing parties for her daughter's birthdays, as well as, holiday parties.  She sews gorgeous dresses for her daughters too.

I bought a pdf pattern for the baby ballet slippers from mompetitviolon on Etsy. They are easy to crochet and so so so cute!!  I accented the crochet flowers with vintage buttons that I picked up from a local antique store.

As far as the blanket goes I made it up as I went but the main pattern was a large granny square and then I finished it with treble crochet stitches and a shell pattern.

Handmade gifts are so personal and crochet is classic.  I look forward to seeing Olivia wrap her baby girl up in this blanket one day.


Monday, December 13, 2010

I love Henna for hair!!

(Did you know that Lucille Ball hennaed her hair?! That is cool.  She even references it several times in the show, "I Love Lucy" and in interviews)


I came across a blogger who hennaed their hair and I immediately became interested.  Red hair and natural?!?!  Could it be? I have been blond all of my 26 years.  I started off being a very light blond but not quite a "toe head" and then it turned a more dirty blond with some highlights as I got older.  As an adult I would get all over highlights put in to brighten the color some.  I loved being a blond but have always had a love for red hair.  I finally convinced my husband to let me dye my hair darker so a few month ago I had my hair chemically dyed a deep red which almost looked a little on the brown side. I used a picture of Amy Adams as inspiration but I think her hair looks redder.  Anyway, the chemical dye is not only expensive but...um chemical and fades badly. I didn't want to damage by hair or health with chemical coloring anymore and I didn't want to spend a lot of money for a color that fades so I was happy that I found an alternative.
  
(My chemical dye job.  I had some highlights put in for dimension)

I went straight to the Google machine and found several helpful websites on henna for hair.  Most of them agree that 100% body art quality henna was the best to use for a natural hair dye because it is free of metallic salts and added chemicals that could damage your hair.  I found the site,  Henna For Hair very helpful with my decision making. They list real people's experiences with henna and their recipes for their henna mix. I bought the Celebration Henna from them which was only $9.50 for 100 grams and I used 300 grams for my long, thick hair.

The thing to remember about henna is that it will not lift color.  It only adds transparent color to the hair.  That means that everyone's color will turn out different and that it will allow natural highlights to show through.  The more you henna the deeper the color gets because you are layering the transparent color. The lighter your starting color the brighter the red and the darker your hair the deeper the red.


(this is the morning after I hennaed my hair.  It is quite bright and in person it was a coppery orange red)
(This is almost a full week after I hennaed.  The color is fully oxidized which turned the bright coppery orange red color into a rich deep coppery red)


When hair is hennaed, the starting color will be bright and coppery orange. Of course people with darker hair will experience less orange in their color.  Over the next week the henna will oxidize into a deeper color.  Maybe a few shades deeper.  Just think of how an apple oxidizes after being cut.  At first I was shocked at how bright the color was.  I had to keep telling myself that the color was going to deepen.  I love the finished color and will just touch up my roots when needed so I don't make my color any deeper.  I may uses a henna glaze from time to time to freshen up the color though.  Henna only fades slightly which is great.

Henna conditions and makes the hair strong and shiny which is why a lot of women who choose to grow their hair long will use henna to strengthen the hair to prevent too much breakage. I am told that as long as you use 100% body art quality henna that you will be able to bleach or dye over the henna with no problems.


Lindsey's Henna Mix

2 cups fresh lemon juice
2 cups distilled water

Mix well in a glass bowl and then cover the surface of the henna mixture with plastic wrap.  Set it in a warm place for at least 12 hours to dye release. Add 1 tablespoon ground cloves to mask smell of henna which smells like hay. Add a little more water if the henna has thickened too much.  It should be like yogurt or cake batter.

Apply it to clean dry hair making sure to get to the roots well.  Pile hair on top of head then cover head with a plastic bag or plastic wrap to help control any leaks.  Wrap a towel around head to keep henna moist and warm.

I left the henna in for about 3 1/2 hours and then rinsed the henna out with lots of conditioner.  Don't wash hair with shampoo for at least 2 days but 3 days is better,

I did a test strip of hair before I did my whole head so I knew what the color would look like around 3 1/2 hours.  Less time would have meant a lighter color red.

I will most likely stick with henna red hair for a long time.  I love it so much.  My great grandmother and some of my great aunts had beautiful red hair so it's neat to have red hair too.

(edited to say that I found the Strawberry Blonde eyebrow powder from Bare Escentuals to work really well with my color)

Thursday, November 18, 2010

Here We Come A-Wassailing

A Christmas wreath in Colonial Williamsburg
Everyone should know this old Christmas song;


Here we come a-wassailing
Among the leaves so green;
Here we come a-wand'ring
So fair to be seen.
Love and joy come to you,
And to you your wassail too;
And God bless you and send you
a happy New Year.

Colonial Williamsburg wrote an article explaining the history behind the curious word, Wassailing. 
 The meaning has changed over time.  It's original use was used as a greeting and evolved into a form of toasting during ritualized drinking. The word wassail came from the Old Norse phrase, ves heil and the Old English phrase was hál which meant, “be in good health” or “be fortunate.”
 Today we associate wassail or wassailing with Christmas. I personally associate it with the movie Little Women because the girls sing it while walking outside in the snow.  I love it. I also think of Colonial Williamsburg when I think of the word or song.  I adore Colonial Williamsburg.

I was looking through my old Southern Living Christmas books from the 80's.  They are filled with classic craft ideas, gift ideas and old recipes.  So fun.  Surprisingly I came across a recipe for Old Fashioned Wassail. It's like a nonalcoholic hot punch. It looks delicious. I plan on making this for Christmas.


Christmas with Southern Living 1986. I own a copy that belonged to my mom but I have seen them sold on ebay.

Old Fashioned Wassail

1 tablespoon whole cloves
1 (3 inch) stick cinnamon
2 quarts apple cider or apple juice
1 quart real no sugar added cranberry juice
1 (46 oz) can pineapple juice
1 (12 oz) can frozen orange juice concentrate, thawed and undiluted
1 (6 oz) can frozen lemonade concentrate, thawed and undiluted
1 cup plus 2 tablespoons water
2/3 cup firmly packed brown sugar
1/2 cup sugar

Tie cloves and cinnamon in a cheesecloth bag. Place spice bag and remaining ingredients into a large soup pot; stir well. Bring to a boil; reduce heat and simmer uncovered for 15 minutes. Remove the spice bag. Yields 1 1/2 gallons.

An inn in Colonial Williamsburg


The Magic of Raw Honey

Beautiful Honey
                I love honey.  It not only taste good but it has amazing healing properties.  The key is RAW honey.  Raw honey is perfectly safe (1 year of age and older).  One of the reason's they pasteurize it is so it keeps it's transparent state and to filter out pollen etc.  Over time raw honey naturally crystallizes. The crystallization doesn't affect the honey's taste or healing properties. You can dissolve the crystals by placing the jar in warm water for about 15 minutes.  Do not microwave your raw honey. Cooking the honey will destroy a lot of the healing properties so if you want to use raw honey for treatments or medicinal purposes then keep it away from heat.
If I had land I would so raise my own bees and harvest honey.  I love just thinking about it.  What a wonderful gift it would make.            


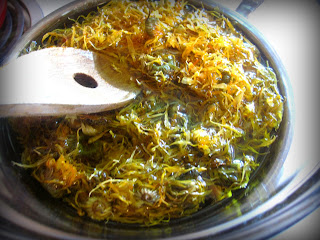
Isn't it amazing how honey bees build a honey comb?!?  I remember my Nana telling me that she would chew on the honey comb as a child.  Simple pleasures for sure.  I tried it and it's kinda nice.  It reminds you of gum but not very elastic.  After awhile the comb compacts and the flavor is gone.  This very honey comb can be used to make salves, lotions and candles. 
 

So we all know honey goes great with hot biscuits but did you know that honey can be used to heal our bodies inside and out?   Raw honey has antioxidants, minerals, vitamins, amino acids, enzymes, carbohydrates, and phytonutrients. 

Honey has been used to heal wounds and burns for centuries. It is naturally antimicrobial and has antiseptic properties that clean wounds and inhibit bacterial growth making it a natural antibiotic for cuts and burns. But remember, it has to be RAW honey. Very important.  There is a huge difference in raw and pasteurized honey in my opinion. The raw honey will promote healing and sooth pain.  

I burnt my fingers twice and both times blisters formed almost immediately. Very painful and ugly.  I quickly held my hand under cold water to stop any "cooking" of my skin and then reached for my jar of raw honey.  I covered the burned area with the raw honey and within seconds the pain vanished! I am SERIOUS. It was amazing. A gift from GOD! I allowed the honey to stay on my skin for awhile and then washed it off.  I was able to use my hand after with very little discomfort.  Of course more serious burns should be seen by a MD or Naturopath. After the doctor has seen it then slather the burn with raw honey for pain relief and fast healing. 

Raw honey has also been used to treat gastric conditions like upset stomach and gastric ulcers.  I developed inflamed intestines which made eating painful. I went on a strict diet for two weeks of nothing but miso soup broth, vegetable broth, fresh juiced carrot, apple, and celery juice, organic apple sauce, and bananas.  In between eating this simple healing diet I drank lots of cooled chamomile tea with a tablespoon of raw honey in order to calm the inflammation in my intestines,
One daily spoonful packs a wonderful punch of nutrients.
 Local Raw honey can aid in allergy relief.  Because local raw honey has tiny bits of pollen from your area in it the pollen is able to triggers your immune system a little at a time causing you to build up a resistance.  In order to reap the benefits you should start taking a couple teaspoons a day for several months prior to the allergy season.  So much healthier than Allegra or Claritin and with more benefits. As with any natural therapy, start off with small amounts to make sure it agrees with you.

I love honey sticks! I remember collecting them at craft fairs and little country stores as a kid.  These would make a great gift paired with a unique tea cup and some organic teas. Sounds like a Christmas present to me.
Time to head to your local farmer's market to pick up some raw honey!

Wednesday, November 17, 2010

Old Fashioned Cake Doughnuts


Doughnuts are one of those foods that you wish could be healthy! lol. I love fluffy yeast doughnuts but my husband especially likes the old fashioned cake doughnuts. Cold weather started to settle in and I felt nostalgic so I thought I would make an old fashion breakfast pastry one morning..  When do I ever not feel nostalgic?!? That's what I get for being raised with wonderful smells, sounds and traditions.  They make old memories so vivid. 

I chose the cake doughnut recipes from my Better Home and Garden cookbook.

Old Fashioned Cake Doughnuts

3 cups All-purpose flour
2 teaspoons baking powder
1/2 teaspoon ground cinnamon
1/4 teaspoon ground nutmeg
2/3 cup milk
1/4 cup butter, melted
2 beaten eggs
2/3 cup sugar
1 teaspoon vanilla
cooking oil

Combine 2 cups of the flour, baking powder, cinnamon, nutmeg, and 1/4 teaspoon salt. In a medium bowl combine milk and melted butter. In a large mixing bowl combine eggs, sugar, and vanilla; beat with an electric mixer about 3 minutes or until thick. Alternately add flour mixture and milk mixture to egg mixture, beating after each addition just until combined. Stir in remaining 1 cup of flour. Cover dough; chill for 2 hours.

Chocolate Cake Doughnut Variation

Prepare as above, except omit cinnamon and nutmeg and increase sugar to 1 cup. Reduce the amount of flour that is stirred in at the end to 1/4 cup (for a total of 2 1/4 cups flour) and stir in 3/4 cup unsweetened cocoa powder. Continue as directed. I used Hershey's Special Dark Cocoa.  It makes the doughnuts dark and rich.


Turn dough out onto a lightly floured surface, roll dough out to 1/2 inch thickness. Cut dough out with doughnut cutter.  Fry doughnuts in deep hot oil (375'F) about 1 minute on each side or until golden. Drain on paper towels. You can shake warm doughnuts in a bag with sugar. I made a thick glaze. Put 2 cups of powder sugar in a bowl and add a pinch of salt, 1/2 teaspoon vanilla and enough milk to make a thick consistency but thin enough to dip the tops of the doughnuts in. Lay out of cooling rack until the glaze stiffens.


I definitely want to make sure I have enough frying oil next time.  I think that my doughnuts could have risen more if the oil was deeper instead of the doughnut touching the bottom of the pan.  They were still moist and yummy though!  I would suggest watching the chocolate ones closely while they fry because they can easily burn since they are dark to begin with.

So easy! Enjoy.


Sunday, October 24, 2010

Herbal Infused Oils - Calendula


Calendula is used externally for its antiseptic and healing properties in treating skin conditions like, infection, cuts, scrapes, burns and chapped or chafed skin and lips. Infusing olive oil with Calendula flowers is a great way to add healing properties to salves, lip balm and lotions. I ordered my dried calendula and cold pressed olive oil from Mountain Rose Herbs.


I measured 2oz of dried Calendula flower by weight on my scale and 16.25oz of olive oil by weight. Basically you loosely fill a jar 1/2 full with calendula and then add olive oil making sure to remove all air bubbles. Keep adding olive oil until it fills jar just below rim. Add the olive oil and calendula flowers to a double broiler on very low heat. Don't let the oil get too hot. Just warm to touch. I turned the heat off and on from time to time to make sure the oil did not get too hot. Let it heat for 90 minutes. Pour flowers and oil into a clean dry jar and let it sit, covered for a few hours. 
After the infused oil has sat for a few hours it is time to strain into a cheesecloth lined strainer that is positioned over a clean dry bowl.  Gather up the ends of the cheesecloth and squeeze the dickens out of it.
Put your fresh Calendula infused oil in a clean dry jar and label.

Another method for infusing oils is to fill a jar 1/2 full. Fill with olive oil and then set out in the warm sun for 2 weeks.  After two weeks, strain and add a new batch of dried herbs and set in sun for two more weeks. Strain then bottle.  You can see why I choose the double boiler method. Now you can use your new Calendula infused oil in my Coconut oil lotion recipe, Lindsey's Perfect Body Butter or a salve. 

Saturday, October 23, 2010

Body butter


So I think I have perfected the best lotion/butter for my family's skin.  My first lotion was a little too greasy for me but my husband liked it for his dry skin. This time I decided to replace some of the coconut oil with cocoa butter. Since I added cocoa butter the consistency is more like a body butter than a lotion. You can add more "water" if you want more of a lotion instead of a butter. I have to say that I love the consistency of the butter more than the lotion.
Lindsey's Perfect Body Butter
3/4 cup coconut oil
1/2 cup olive oil
1/2 cup cocoa butter
1/4 cup calendula flower oil
2 grams vitamin E oil
2 grams Grapefruit seed extract
20 drops or more of essential oil
6 tablespoons aloe vera juice
10 tablespoons Chamomile infusion
2 oz beeswax

Follow the same directions as my Coconut oil lotion.

I added the natural preservatives, Vitamin E oil and Grapefruit seed extract to help extend the shelf life of my lotion plus it is good for your skin.

Natural Cleaning Supplies

I have been slowly replacing all of my cleaning supplies with natural alternatives.  I have already been using my own homemade all purpose cleaner for a few years now. It works great. I put it in a pray bottle.

All-Purpose Cleaner

1/2 cup white vinegar
1/4 cup washing soda or baking soda
2 teaspoons borax
1/2 gallon water
2 tablespoon tea tree oil

~White Vinegar - cuts grease, removes mildew, removes odors, some stains, cleans windows and wax build-up.

~Washing Soda -Soda is a mineral. Washing soda cuts grease, removes stains, softens water, cleans wall, tiles, sinks and tubs.

~Baking Soda - cleans, deodorizes, softens water, scours surfaces.

~Tea tree oil - kills mold, anti viral, anti bacterial, anti fungal, kills mold smell and odors.

~Magic Eraser - Makes natural cleaning easy.


Powdered Laundry Detergent

 2 cups Dr. Bronner's unscented Castile bar soap or Ivory soap or Fels Naptha soap 
1 cup washing soda
1 cup borax 
1 teaspoon essential oil
 
 (2 tbsp per load)


Grate the bar of soap. One bar of Bronner's castile soap makes about 2 cups.

Measure out washing soda and borax. Mix well with the grated soap.  Add the essential oil of your choice.  I choose grapefruit essential oil since it is a fresh and unisex scent.

I store my detergent in this jar I got from IKEA.  I found the perfect scoop from a kitchen store.  It measure 2 tablespoons.
I keep Costco bulk white vinegar and baking soda on hand for all of my cleaning jobs.

Wednesday, October 6, 2010

Canned Crushed Tomatoes

Vintage WWII canning books I bought from eBay


I found these beautiful vintage canning books from eBay.  All three came together and date from 1939 to1941. It's so neat to see that the big book only cost $.10. Most often the mini pamphlets came free with a purchased item. Maybe with a box of Kerr jars.  Surprisingly these books are in great condition considering their age.  While looking through this piece of history I decided to can something and the only thing that came to mind were the many heirloom tomatoes coming out of my garden.

Heirloom tomatoes from my little garden

Canning is pretty easy.  There are two different ways to "can" food depending on what you want to preserve.  There is the "Hot Water Bath" and the "Pressure Cooker Method".  Jams, jellies, pickles and some types of fruits and vegetables can be canned in a hot water bath which I think is the easiest. These may be Kerr canning books but I grew up with everyone in my family using the Ball canning book and jars.  Both companies follow the same national canning guidelines but they have their own jam and pickle recipes I'm sure. Ball has a great website with canning how-to videos and recipes. 

I followed the directions for canning crushed tomatoes. Very simple. I blanched the tomatoes in boiling water and then dropped them into ice water.  This allows the skin to peel off easily. I then put the peeled tomatoes into a bowl to crush them up.

Using a pastry blender made crushing the tomatoes very easy
Fi1lled my clean jars with the crushed tomatoes and topped them with sea salt
Canning in a hot water bath for the specified amount of time
And the finished product, Canned Crushed Tomatoes
Home canning is so normal to me.  It was a way of life growing up.  We either canned or froze our garden's harvest each year.  Some things are definitely better canned and some are better frozen.  Green beans hold their shape best when canned and butter beans are better frozen. Check out the other things I have canned.


Thursday, September 23, 2010

Crochet Produce Bag


The Purl Bee offers yet another awesome crochet pattern.  The Mesh Crochet Produce Bag.  It could easily be used as a beach bag as well. It was surprisingly easy given its complicated look.  I think the step by step picture tutorial really helps clarify the pattern. The pattern calls for linen yarn but I just used what I had.
The great thing about this bag is that it is eco friendly.  I know that is a word uttered often today and all crunchiness aside, it is important. The idea is if more and more people use reusable produce and grocery bags then plastic bag companies will make less and less of them in turn preventing more plastic bags from being dumped in ever growing land fills. Ok, off my soapbox.

Just fill your grocery cart up with your fresh produce 9without those plastic bags0 and then when it's time to check out just bag up your produce in these cheap to make, reusable mesh bags.


The Purl Bee tutorial explains how to measure it correctly.
I do want to stress the importance of stretching the bag out well and measuring as you go. I definitely did not stretch it well enough because after filling it with lemons, the bag stretched out quite a bit.  It should measure sixteen inches but mine now measures nineteen inches. I learned my lesson. I have to get it perfect if I want to add them to my etsy store.  Speaking of my etsy store, I want to change the name which means I would have to open an entirely new store.  I have a few names in mind but it is so difficult trying to choose one that fits my personality or the feelings I want to evoke.

~Ciao~


Wednesday, September 22, 2010

Vintage Red Lips


Oh the famous red lip.  It's synonymous with vintage. Everyone was wearing a red lip in the 40's.  Some reds have a blue base and some have an orange base. You have your pink reds and your brown reds.  The key was that it was RED.  Up until the beginning of this year I hardly wore chap stick let alone red lipstick.  Finding Casey from Casey's Elegant Musings changed it all for me.  My first red lipstick and still one of my favorites is the cheap N.Y.C Retro Red. It's a classic matte red.  I found it at target for under $2. I also bought N.Y.C Ruby which is a dark pink red perfect for wearing with pink and purple outfits. 
Retro Red is a true red.

Revlon Certainly Red is a new favorite that I keep in my purse.
The first couple of times I wore red lipstick it feathered so bad and wore off quickly.  Then I found Bare Escentual's Lip primer.  A pure necessity when it comes to keeping red lipstick in place.  I apply this to my lips first going just slightly over my lip line.
Next I line and fill in my lips with a red lip liner.  I use a cream lip liner by Palladio in Red Rose. Then I apply my red lipstick.  Easy peasy.  No gloss needed for a vintage look.  Matte lip color was very popular.
Beautiful Max Factor Lipstick ad featuring Rita Hayworth
.
I bought a tube of this vintage inspired lipstick made by Besame Cosmetics.

"Most describe it as petite,
but this 55mm size gold bullet packaging is reminiscent of the decorative
cases used during the post-war 1940’s when metal was in big demand for the war.
And yes it looks very similar to a bullet. Inspired by several original 1940's containers from my collection this was the first product I designed when I started Besame.
Besame Cosmetics

Vintage Me

Vintage me with my new Rita Hayworth red hair.
Vintage me with my blond hair (that I miss from time to time)

I have always loved vintage ladies, vintage decor, vintage clothes, vintage music and movies and pretty much vintage everything. I used to flip through my families' old black and whites and just stare at every detail.  The curl of the hair, the cut of the dress, the red lips. Oh so classy and timeless.  Around the beginning of this year a few blogs caught my eye. There are ladies living vintage lives in this modern day world.  I mean completely vintage.  The clothes in their closet are either thrifted vintage or vintage inspired.  One vintage lady in particular is Fleur from London. Her blog, Diary of a Vintage Girl, is full of stories about her vintage modeling, vintage gatherings, and tea parties.  She is one of the most authentic looking forties enthusiast I have come across.
Fleur writes for The Chap

Not all of the vintage blogs I follow are just 40's fashion and lifestyle but also the 20's and 30's.  I prefer authentic vintage to the rockabilly style that is popular.

Casey Brown of Casey's Elegant Musings sews most of her wardrobe from vintage sewing patterns.
Wearing History
also makes a lot of their own clothing

The Call of The Jitterbug
Tea With The Vintage Baroness
Gatsby and Me
These are only a few of the many vintage blogs out there.  I'm not sure that I can become completely vintage like these girls but I sure do love incorporating vintage style into my life. I like to think more on the lines of Antropologie.  Mixing vintage and modern with a little hippie or bohemian thrown in.  Keeps things interesting.


Next I will blog about vintage hair and makeup.