Thursday, April 7, 2011

Fresh Homemade Butter

This butter mold and paddle belonged to my Mamaw Ola Mae.  It's a special piece of my family history.  I'm so thankful that my Aunt Carol gave them to me.  I would love to find an old glass jar butter churn.  I've seen plenty at the antique stores in Amelia, Va. but they can be kind of pricey for a really nice usable one. I'll put that on my wish list.

Butter has to be one of the simplest things to make.  Sure you can buy a tub or box of butter in the grocery store but making homemade butter with your kids is so fun. It makes a wonderful gift too. It's easy to mix in honey or jam for an extra special treat.

Whip as much heavy whipping cream as you want. You will watch it turn to whipped cream, then curdle, and them magically the butter solids separate from the buttermilk.  The butter fat will cling to the mixer, leaving the buttermilk in the bowl. (You can use a stand mixer, hand mixer or even a mason jar with two marbles and shake.)

Remove all of the butter and rinse under cool water to remove any buttermilk.  The butter will last longer since the buttermilk spoils fast than the butter fat.  Fold the butter over itself to squish out all liquid. Now it's ready to eat!  It will be firm like real stick butter. You can now add salt, honey or jam to it and whip it up.

Store your butter and buttermilk in the fridge.  You can drink the buttermilk or use it in cooking.

Wednesday, April 6, 2011

Homemade Yogurt

We love yogurt in our family.  We use it for more than just a breakfast food.  I use yogurt instead of sour cream and mayo for a lot of my recipes.  I LOVE making things from scratch.  I find myself on the look out for other things I can start making from scratch. The other day I read on BlueBirdBaby's blog about homemade yogurt. I was like, duh! Why haven't I thought of making homemade yogurt before?!? So with my husband's permission I bought a yogurt make from Amazon.  If you don't want to buy a yogurt maker you could always use the oven method as well as other types of methods but I prefer the yogurt maker because it has a constant temperature and I can leave it over night.


Homemade Yogurt
 42 oz of milk (whole, skim or 2%) or enough milk to fit in the containers you will be using.
 6 oz plain yogurt (store bought or homemade yogurt) or 1 oz for every 6 oz of milk.
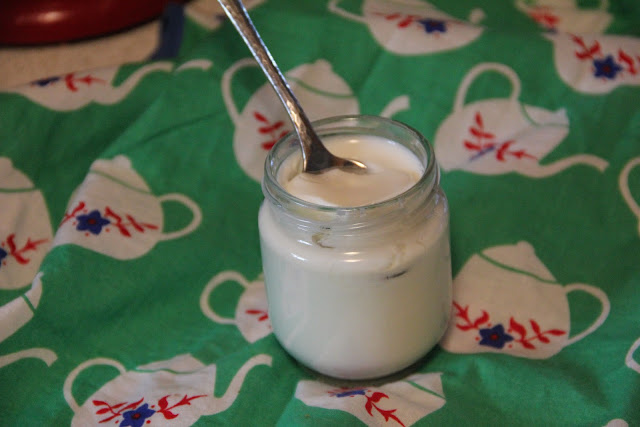
   Wash and dry all of your utensils well.  Heat milk to 180F. Remove pot from heat and let cool to 110F.  Add in the yogurt to the cooled milk and stir until dissolved completely. Carefully ladle the mixture into your containers.  My yogurt maker's directions ask me to put all seven jars in the machine WITHOUT their lids.  I covered the jars with the machine's lid and turned on the machine and let it sit for 12 hours. After they were finished I chilled them for a few hours.  


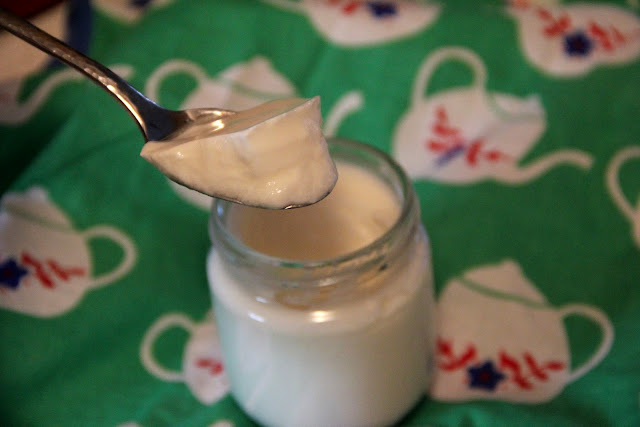
It was so exciting to see that firm texture come out of these cute little jars! 


She got a little carried away with the honey stick

Amelia insisted on eating out of the jar.  She loved the yogurt so much we ended up eating THREE jars today! She kept asking for more.  We added some frozen blueberries, a touch of vanilla and raw honey. It was perfect. Now I need to make some of my crunchy GF granola.

Edited 7/6/11 to say that I started using yogurt cultures from Cultures For Health. I bought their reusable heirloom Greek yogurt cultures which means I can use the cultures indefinitely! Yogurt A is used to make yogurt B and yogurt B makes yogurt C and so on!  I love the tangy flavor and thickness of the Greek yogurt. I also bought the Bulgarian yogurt culture which they compare to commercial yogurts. I make a new batch of yogurt once a week to keep the cultures strong. They even carry yogurt cultures for making dairy free yogurts as well as Kombucha, kefir, buttermilk, sour cream, and sourdough!

Tuesday, April 5, 2011

hanging bird seed "cakes"


My daughter loves birds and when she spots one she goes nuts.  So excited.  I thought making bird feeders would be a nice craft to do with her.  I found a recipe for bird seed "cakes" from The Magic Onion.  It's so simple.

Bird Seed "Cakes"

1 oz knox gelatine (4 packets)
1 cup boiling water
3-4 cups bird seed (I used finch bird seed)

Mix the 4 oz gelatin with the 1 cup boiling water and stir till dissolved.  Add in the seeds till a stiff mixture forms. Spoon seed mixture into molds of your choice.  Cut ribbon, yarn or jute string 12-24 inches long. You will want it long enough to bury 2-3 inches of one end into the seed mixture while leaving the other end long enough to tie on a tree branch or hang from a nail.  Let sit for a few hours.  Putting it in the fridge will speed the process up a little. Make sure the "cakes" are completely firm before removing them from the mold. 
To un-mold, dip the bottoms of the molds into hot water for a minute or so and if needed, use a knife around the edges to loosen a little.  Gently remove the "cakes" and hang.


We also filled some pines cones that we brought back from Va. The seed mixture stuck really well into the pine cones.  We tied jute string to the top of the pine cones.


Here is the finished product.  I hope the birds like them.  I love to hear a bird sing. 


Monday, April 4, 2011

Victorian Flower Press


I remember pressing flowers as a little girl.  I used a book instead of a nice flower press.  I bought a flower press from Michaels.  Very basic and inexpensive  Amelia and I had a lot of fun picking flowers from around the yard.  This is the only time Amelia is aloud to pick my flowers! She has a habit of picking every flower and with an excited look on her face she hands them to me.  It's hard to get mad at that happy face.


I picked up a pack of transfers for another project but couldn't resist adding a few butterflies to our flower press.  I may even stain the wood.  I'm not a fan of the "new wood" look.


I think I will dry a bunch of flowers so that I can use them on Amelia's birthday card envelopes to add a special touch. I like the idea of adding them to a journal or handwritten recipe book.